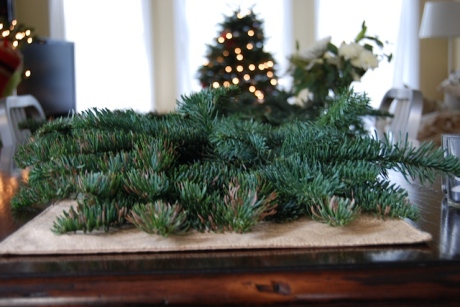
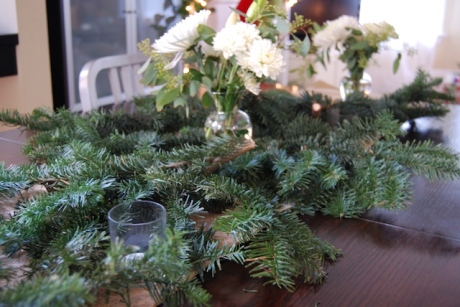
Last night we hosted a little dinner party. I made this simple centerpiece that was inexpensive and super festive. Here’s what you’ll need:

  • A table runner
  • White or red bouquet of flowers
  • Small votive holders & small glass vases
  • Tealight candles
  • Fresh pine tree clippings

The whole spread cost less that $10 dollars. I went to our neighborhood hardware store and asked if they had any Christmas tree clippings lying around, they pointed me in the direction of a huge bin and offered me as much as I wanted for free! I can’t wait to get a bunch next year and make wreaths and garland for our mantle!

Begin by laying down your runner. This gives you a good guide as well as keeps any sap from dripping on your table. Next arrange the stems in an even layer on the runner, adding enough so to not leave any gaps. I had a pair of clippers on hand to trim some branches off and keep it straight.

After that arrange your flowers into a few separate vases. I bought one bouquet from Trader Joe’s and divided it up into the three. I like the look a smaller simpler arrangements rather than huge gaudy elaborate ones. Nestle the flowers along with the candles around the greenery.

Images: sammyw

Paige is going to be 3 months old tomorrow (crazy!). Like I mentioned a while back, I wanted to compile a list of newborn essentials I swear by. Here are a few of our favorite things.

Newborn Must Haves


1. Sophie the Giraffe Paige has just started loving this teether. The feet are easy for her to grab and put in her mouth. It’s made of natural rubber, so it’s super soft and lightweight for her to hold on to.

2. Wearable Blankets I’m not going to lie, I think these things are super ugly and look really cheesy. All that aside they are very practical. With the cool San Francisco summers and our 100 year old apartments drafty windows, this allows Paige to keep warm without having to worry about a blanket getting anywhere near her head. And for that I love these things.

3. Glass Bottles We try our best to stay away from plastic products and stick to glass in our kitchen, so we’d choose nothing different for the baby. I love these bottles. They are easy to clean, heavy duty and adorable. It’s so nice being able to pump and take a bottle for Paige when we’re out for lunch or at church. Bottles are also wonderful for leaving Paige with babysitters for date night.

4. Bouncer I stick Paige in this bouncer & she travels around the house with me. It sits on the table while Isaac & I are eating breakfast and dinner, I put it on the bathroom floor while I shower, it goes in our room while I fold laundry, in the living room while I work out and in the kitchen when I cook dinner. It’s sweet having my little buddy with me everywhere I go, she is so content and watches everything I do. We also have the matching swing which was wonderful for the first month, but since sleep training Paige to sleep in her crib, we barely use the swing anymore.

5. Swaddle Blanket This blanket is amazing. It’s made of thick flannel, it’s huge; perfect for wrapping up a burrito baby. Paige slept and napped swaddled for the first two months and it was a dream. Whenever she would get all riled up, we’d swaddle her and walk her around the apartment and she calmed down almost instantly.

6. Sleepers Sleepers with feet and a zipper are far superior to those without feet and with snaps. Baby socks never stay on, especially during the night, so having the feet all in one sleepers are wonderful. Also diaper changes are a hourly affair in the beginning, being able to quickly zip instead of snap 10 buttons is swell, especially at 2am.

7. White Onesies I love these. I prefer the Carters brand to Gerber, they are thicker and made better in my opinion. Little babies should be comfortable and cozy, and all babies look precious in white. These are great for layering under outfits too for cooler weather. You can’t have to many of these.

8. Diaper Cream Burt’s Bees diaper cream is awesome. It smells wonderful and is paraben free, made with almond oil and beeswax. And best of all it works in a day. Love this stuff.

9. Stroller I spent so much time researching strollers. Since walking is our main mode of transportation for us city dwellers, I had a long wish list. Lightweight, small, easily foldable, affordable, could be used from birth on up, just to name a few. I am so happy with this City Mini. It is super light, can fold with one hand and is super smooth and folds to almost nothing. You can purchase a carseat adapter separately but we haven’t even needed to, she’s been fine in the stroller with one of these to make it extra snugly since birth. We take this thing everywhere, out to coffee, grocery shopping, walking through Golden Gate Park and to church.

10. Tights Using tights are another way to keep little feet warm without worrying about socks. Paige has tights in all colors (cream, pink, red, gray, yellow, etc) it’s easy to stick them under a Carters’ onesie and you’ve got a cute warm outfit.

11. Portable Diaper Changer Another city living must. Most places don’t have a changing station in the bathroom, if they even have a bathroom at all. This allows me to change Paige anywhere, it’s already proved it’s worth in these last few months.

12. Pampers Swaddlers These diapers are so soft, lightweight, and leak proof. I used some Huggies for a while and couldn’t believe how much better Pampers are. Sign up for Amazon Mom and Subscribe and Save and these diapers are surprisingly affordable.

13. Sleep Sheep Isaac & I both lost our voices ‘shhhing’ Paige to calm her in the beginning. Then we downloaded a white noise app on our phones. That worked awesome, until we needed our phones. This Sleep Sheep attaches to her crib has four calming noise choices and is set to a timer. She loves her little sheep. We use the ocean setting. A word of advice, stay away from the whale setting, it’s pretty scary.

It is no coincidence that the main ingredient in my first post after baby is caffeine.

Paige is 7 weeks already, everyone was telling the truth when they said it really does fly by. I can’t believe she’ll be 2 months old next week. I’ve been averaging 4 hours sleep for a while now and although I’m managing, this coffee sure is doing it’s fare share to help out.

Here’s the sweet one hanging out on the table, watching me make my morning cup.

The recipe couldn’t be more simple. Basically grind coffee, mix with room temperature water and let sit out overnight. Strain, pour over ice, add water and some cream and your good to go.

Cold Brew Iced Coffee
Recipe From: Smitten Kitchen

  • 1/3 cup ground coffee (medium-coarse grind is best)
  • Milk or cream (optional)
  • Sugar (optional)
  • Water
  • Ice

In a jar, stir together coffee and 1 1/2 cups water. Cover and let rest at room temperature overnight or 12 hours. Strain twice through a coffee filter or a sieve lined with cheesecloth. In a glass filled with ice, mix equal parts coffee concentrate and water, or to taste. If desired, add milk, cream and/or sugar. Makes 2 drinks.

Images: sammyw

Paige Olivia arrived May, 6th (10 days early!) at 3:20pm, weighing 6lbs 4oz 19 1/2 inches long. We love her so much!

Life is so very full right now. Busy. Isaac has been working like crazy and preparing to leave for a business trip in a couple weeks, our taxes are still not done, we’re scrambling to read the last few chapters of our birth prep book, lead Bible study at our house, pursue relationships and love thy neighbor whose dog only seems to bark on Saturday mornings.

Without fail though, every single night after dinner while the candles still linger we settle into the couch, pull over the cotton blanket my mom bought us for Christmas and we talk to Paige and feel her move, squirm and shimmy in my belly. And all the busyness comes to a halt. It’s amazing to me how much we already love this little in my belly. I feel her move all the time now. In the middle of the night, on the bus, cooking dinner, driving to Target. I’m pretty sure she already knows her name because we can say it and she responds with a little love tap.

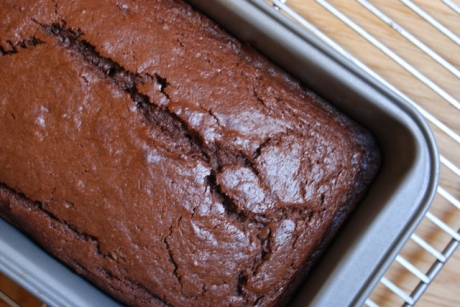
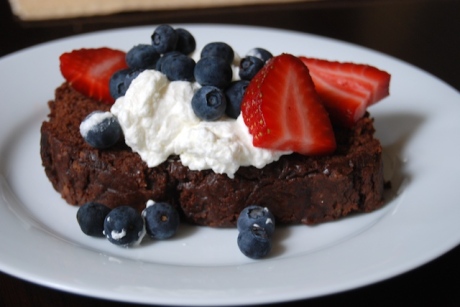
I vividly remember having a full on conversation with Paige while baking this cake. Explaining to her why we sift the dry ingredients and why buttering the pan with a little extra butter always makes sense, especially when removing it from the pan. The cake is pretty basic, although was a little dry in my opinion. It actually tasted way better the next day and the day after. I would make it again and maybe mark down the cook time 5 minutes or so. It tasted awesome with fresh whipped cream and a bunch of fresh berries.

Everyday Chocolate Cake
Recipe from Smitten Kitchen

  • 1/2 cup unsalted butter, room temperature
  • 1 cup packed light brown sugar
  • 1/2 cup granulated sugar
  • 1 large egg, at room temperature
  • 1 cup buttermilk
  • 1 t vanilla extract
  • 1 1/2 cups all-purpose flour
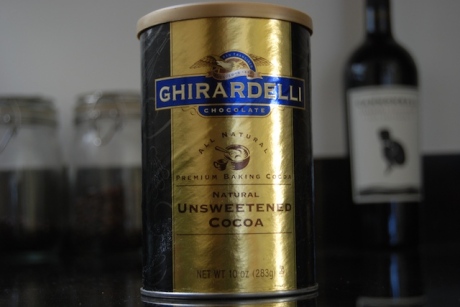
  • 3/4 cup natural cocoa
  • 1/2 t baking soda
  • 1/4 t salt

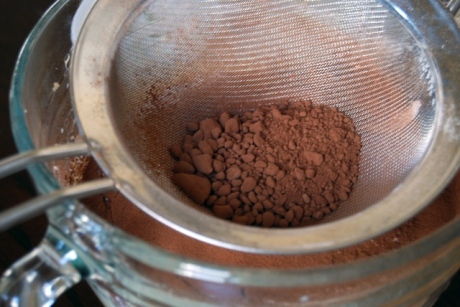
Preheat the oven to 325. Butter and lightly flour a 9×5×3-inch loaf pan. In a bowl, on the medium speed of an electric mixer, cream the butter until smooth. Add the sugars and beat until fluffy, about 3 minutes. Add the egg and beat well, then the buttermilk and vanilla. (Don’t worry if the batter looks a little uneven) Sift the flour, cocoa, baking soda, baking powder and salt together right into your wet ingredients. Stir together with a spoon until well-blended but do not over mix. Scrape down the batter in the bowl, making sure the ingredients are well blended. Pour the batter into the prepared loaf pan. Bake for 50 to 60 minutes, or until a cake tester inserted into the center of the loaf comes out clean. Cool in pan on a rack for about 10 to 15 minutes, at which point you can cool it the rest of the way out of the pan. Serve with whipped cream and fresh berries.

Images: sammyw

We’ve been getting so. much. rain. this week. Trees have begun to fall over in Golden Gate Park because the ground is so soggy. Although all this rain makes for a pretty green view outside our family room window.

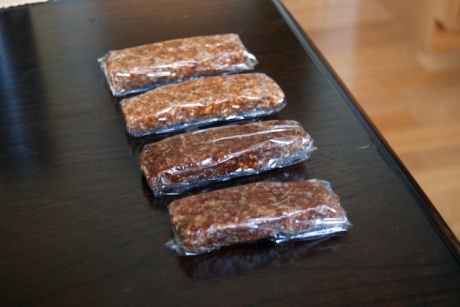
In other news, a sweet friend of mine passed along this recipe for homemade Lara Bars. I’ve been searching for a recipe for quite some time now, in hopes of making these for cheap in my own kitchen.

Before you attempt this in your kitchen, I think a food processor is a must for this recipe. I have no idea how you would do it otherwise. Isaac bought me our food processor last Christmas and I have used it countless times. Last year I was trying to decide if a Kitchenaid mixer or food processor would make more sense for the kind of cooking I do and in the end I decided on the food processor and I am so glad I did. I make salsas, pie dough, pizza dough, grind oats for oat flour, grate bulk cheeses, shred carrots, chop nuts, etc. If you do more cooking than baking I would say go for the food processor. I have this one and love it to the moon and back.

Homemade Cherry Pie Lara Bars
Recipe from Enlightened Cooking

  • 1/2 cup chopped dates (roughly chopped whole dates)
  • 1/2 cup dried cherries
  • 2/3 cup whole pecans, almonds or walnuts (I used almonds)
  • 1/4 t cinnamon

Makes 4 bars. Set out four pieces of plastic wrap for shaping and wrapping the bars. Pour chopped dates and cherries in a food processor. Pulse until processed to a paste and the whole mixture forms a ball together in the food processor. Scrape out into a bowl, set aside. Add the nuts to the processor and pulse until very finely chopped. Add the nuts, along with the cinnamon to the bowl with the fruit paste. Use your fingers to knead the nuts into the paste until fully combined. Divide mixture in four equal parts. Place onto plastic wrap and shape into bars using your fingers. Tightly wrap the plastic around each bar and store in a large container in the refrigerator.

I made a several cherry pie bars and some apple pie bars as well. Take a look at LaraBar’s website for inspiration on what new flavors to make, they list the ingredients right on the website, so just adjust the nuts/fruit depending on which bar you are making. The measurements above will stay the same, but for example the apple pie I used:

Apple Pie Lara Bars

  • 1/2 cup chopped dates
  • 1/2 cup dried apples
  • a small handful of raisins
  • 1/3 cup walnuts
  • 1/3 cup almonds
  • 1/4 t cinnamon

You will be amazed at how wonderful these work and taste. They probably cost .30 cents a bar to make as opposed to paying $1.30 per bar at the store!

Images: sammyw

I love to bake but with just Isaac & I in the house a full batch of cookies or a dozen muffins are just a little overboard for us to eat at any given time. Plus who wants to eat a 3 day old muffin!? Trust me by day 3 or 4 that muffin has lost it’s lure. I’ve come up with a plan to prep remaining unbaked dough to store in my freezer for a later time.

For cookie dough, I use my cookie scoop to spoon out remaining dough and place it on my cookie sheet lined with parchment paper. I slide this into the freezer for about an hour until the dough has a chance to harden a bit. Then I pull out the dough, place them in a freezer bag labeled ‘Chocolate Chip Cookie Dough 350 10-12 minutes’. That way I know what is inside and how long to bake and at what temperature. This has worked so well for us, we are able to bake off 6 or so cookies at a time and they are always warm and fresh. Plus it works great in a pinch if we have people over for coffee on the fly I usually always have some dough in the freezer ready to use.

For muffins, I fill the muffin tin lined with baking cups and place the whole tin in the freezer again for about an hour. This allows them to set as well as hold their shape. After a hour, I do the same thing as I do with the cookie dough. Stick them in a freezer bag labeled with the contents and baking instructions.

The possibilities are endless. I do the same thing with pizza and pie dough. Whenever I make these I always double the recipe, it is no more work to pulse 1/2 stick of butter vs 1 cup in the food processor. And the ease of being able to pull out homemade pizza dough dough on a busy weeknight is so worth the little extra effort.

Images: sammyw

We are in the home stretch. Only about 10 more weeks to go til my due date and baby preparation plans are in full swing.

Last weekend we finished assembling her dresser and crib, found a rocking chair on Craigslist and made her crib skirt. Isaac & I have been reading through our birthing book and have taken a tour of the birthing center. Just as we are checking things off our to-do list, more are suddenly appearing. Birth Plans! Pediatricians!

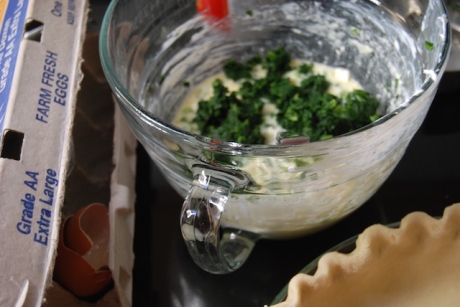
This quiche was made with a frozen pie dough that I had made a month or so ago, so it was super simple to whip up this quiche on a Monday morning. We ate this throughout the week with sliced strawberries, fresh blueberries and yogurt on the side.

Spinach Quiche
Recipe from Smitten Kitchen

Quiche Dough: Martha Stewart’s Pate Brisee

  • 1 3-ounce package cream cheese, room temperature
  • 1/3 cup half and half
  • 3 eggs
  • 1 10-ounce package frozen chopped spinach, thawed and drained
  • 1/2 cup grated cheddar or gruyere
  • 1/4 cup grated Parmesan
  • 4 to 6 green onions, thinly sliced
  • 1/4 t salt
  • 1/4 t pepper

Preheat oven to 425°. Beat cream cheese in medium bowl until smooth. Gradually beat in half and half and eggs. Mix in remaining ingredients. Pour mixture into prepared crust. Bake until crust is golden brown and filling is set, about 25 minutes. Cool 10 minutes before serving.

Images: sammyw

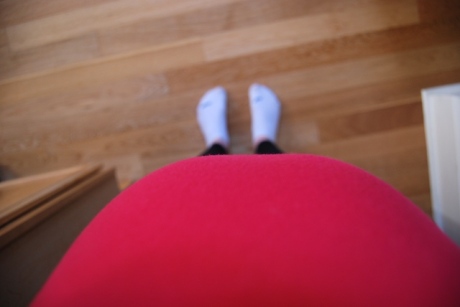
This week marks week 30 in my pregnancy. Only 10 more to go! I’ve been surprised at the amount of ‘maternity’ items that I’ve been able to do without. It is overwhelming and a little ridiculous to me to think about re-creating an entire wardrobe for a small 4 month or so time frame. I thought I’d give a little run down of the basics I’ve purchased and how I’ve morphed my pre-pregnancy wardrobe to work for my ever growing belly.

How To: Maternity Clothes

Pants: I have 2 pairs of maternity jeans (one denim, one gray). Each I found on sale for under $40. I also have some black leggings that still fit and work with my big belly.

Tops: I have 5 maternity shirts, all bought on sale for under $15 a piece. They are all very simple,  solid in color (white, black, gray, dark blue, cream), thin shirts I can layer with my existing cardigans, jackets and wraps. I also have 2-3 non-maternity shirts in my next size up and have been able to use those as maternity tops as well.

Accessories: I have a Bella Band which worked wonderful the first 6 months until I needed to wear maternity pants. Also I love my maternity camisoles. I have 1 black and 2 whites ones that are perfect for creating length to almost all of my non-maternity tops.

That’s it! With these basics in my closet I feel like I have a ton of choices. When I no longer need my maternity clothes, they can easily be stored in a small container up in our closet. Since I’ve invested in very classic, timeless pieces I will be able to use these for my next pregnancy as well.

I am trying to use these same principles when creating a wardrobe for baby Paige. Due to space and how fast she will grow I want to limit her clothing to only the necessities. Look for a post about her clothes coming up soon :)

Images:
Pants: Old Navy
Scarf: Forever 21
Pink Cardigan: Forever 21
Shirt: Gap
Camisole: Old Navy

We were told we’d awake to a little dusting of snow this morning, but it was all blue skies. Not a single cloud in sight. I’ve heard rumors it did snow at 1am this morning, but who stays up that time anymore! The forecasters played it up (like they normally do) ‘look out for snow at the beach!’ Showing pictures of a snowy Twin Peaks back in the 60’s. Our neighborhood hardware store even put out some snow shovels for the occasion. Really!?

The snow didn’t come, but the cold temperatures sure has. I came home to a 55 degree house the other day, guess it’s time to turn on the heater. We’ve been bundling up in thick socks, warm hooded sweatshirts and practically cuddling next to our little space heater. Thankfully it should be back to the upper 50’s by the end of the week, I don’t know how much more of this cold I can take.

All that aside we are having a sweet weekend. The countdown has begun, 11 weeks from welcoming our little girl and spending the day picking up her rocking chair from Craigslist, hanging a few things up in her room and finishing up her crib. I have a couple sewing projects to work on and all the while we are keeping warm with endless cups of hot tea and coffee. Wishing we had a couple more of these breakfast bars to go with it.

Raspberry Crumb Breakfast Bars
Recipe from Smitten Kitchen

For the crust and crumb:

  • 1 1/2 cups flour
  • 1 cup packed brown sugar
  • 1 1/4 cups rolled oats
  • 3/4 t salt
  • 3/4 t baking powder
  • 1/2 t baking soda
  • 1/2 t cinnamon
  • 3/4 cup (1 1/2 sticks) unsalted butter, cut into 1-inch pieces

For the raspberry filling:

  • 1/4 cup packed brown sugar
  • 1 T grated lemon zest
  • 1/2 t cinnamon
  • 2 T all-purpose flour
  • 1 pound raspberries, fresh or frozen
  • 1/4 cup fresh lemon juice
  • 2 T unsalted butter, melted and cooled

Make the crust and crumb: Preheat the oven to 350. Butter the bottom and sides of a 9-by-13-inch glass baking pan. Put the flour, brown sugar, oats, salt, baking powder, baking soda, and cinnamon in a food processor. Pulse in short bursts until combined. Add the butter and pulse until loose crumbs form. Reserve 1 1/2 cup of the mixture and set aside. Pour the rest of the mixture into the prepared pan and use your hands push the crust into an even layer at the bottom of the pan. The crust should touch the sides of the pan. Bake until golden brown, 12 to 15 minutes. Transfer to a wire rack and let the crust cool. Keep the oven on while you make the raspberry filling.

Make the raspberry filling: In a medium bowl, whisk the sugar, lemon zest, cinnamon and flour together. Add the raspberries, lemon juice and butter and use your hands to toss gently until the raspberries are evenly coated. Spread the raspberry filling evenly on top of the cooled crust. Sprinkle the reserved crust mixture evenly on top of the filling. Bake for 35 to 45 minutes, rotating the pan every 15 minutes, until the top is golden brown and the filling starts to bubble around the edges. The bars can be stored in the refrigerator in an airtight container for up to two days.

Images: sammyw